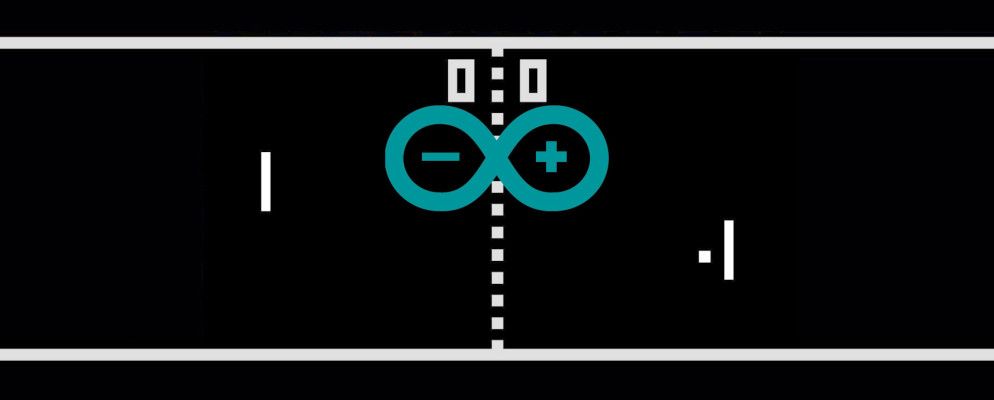
曾经想知道编写自己的复古游戏需要多少工作? Pong为Arduino编写代码有多容易?和我一起,向我展示如何构建Arduino供电的迷你复古游戏机,以及如何从头开始编写Pong。这是最终结果:
构建计划
这是一个相当简单的电路。 电位器(电位器)将控制游戏,而Arduino将会驱动OLED显示屏。这将在面包板上生产,但是您可能希望将其制成永久性电路并将其安装在箱子中。我们之前曾经写过关于重新创建Pong的文章,但是今天我将向您展示如何从头开始编写代码,并分解每个部分。
您需要什么
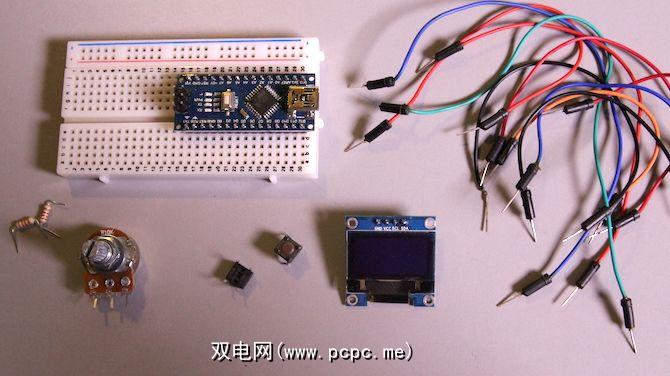
这里是什么您需要:
任何Arduino都可以使用,因此如果您不确定要购买哪种型号,请参阅我们的购买指南。
这些OLED显示器非常酷。通常可以购买白色,蓝色,黄色或这三种的混合物。它们确实是全彩色的,但是它们又增加了该项目的复杂性和成本。
电路
这是一个非常简单的电路。如果您没有Arduino的丰富经验,请先查看这些初学者项目。
在这里是:
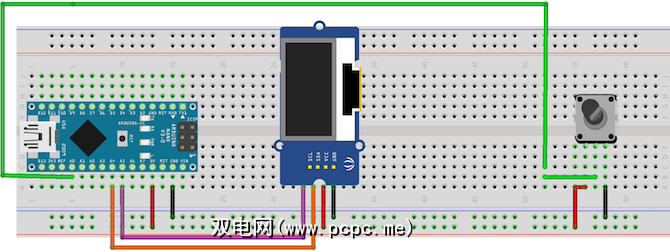
看锅的前面,将左引脚连接到 + 5V ,右引脚连接到接地。将中间引脚连接到模拟引脚0 (A0)。
使用I2C协议连接OLED显示器。将 VCC 和 GND 连接到Arduino + 5V 和接地。将 SCL 连接到模拟五( A5 )。将 SDA 连接到模拟4 ( A4 )。它连接到模拟引脚的原因很简单。这些引脚包含I2C协议所需的电路。确保它们正确连接,并且没有交叉。确切的引脚会因型号而异,但是Nano和Uno会使用A4和A5。如果您未使用Arduino或Nano,请查看模型的Wire库文档。
电位器测试
上传此测试代码(请确保从中选择正确的电路板和端口工具>面板和工具>端口菜单):
void setup() { // put your setup code here, to run once: Serial.begin(9600); // setup serial}void loop() { // put your main code here, to run repeatedly: Serial.println(analogRead(A0)); // print the value from the pot delay(500);}现在打开串行监视器(右上>串行监视器),然后转动电位器。您应该看到在串行监视器上显示的值。完全逆时针方向应为零,完全逆时针方向应为 1023 :
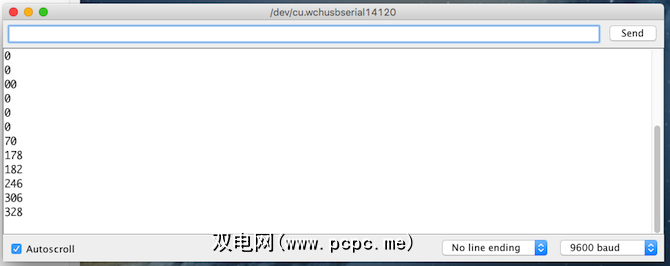
稍后您将对此进行调整,但是现在还可以。如果什么也没发生,或者您不做任何事情就改变了值,请断开连接并再次检查电路。
OLED测试
The OLED display is slightly more complex to configure. You need to install two libraries to drive the display first. Download the Adafruit_SSD1306 and Adafruit-GFX libraries from Github. Copy the files into your libraries folder. This varies depending on your operating system:
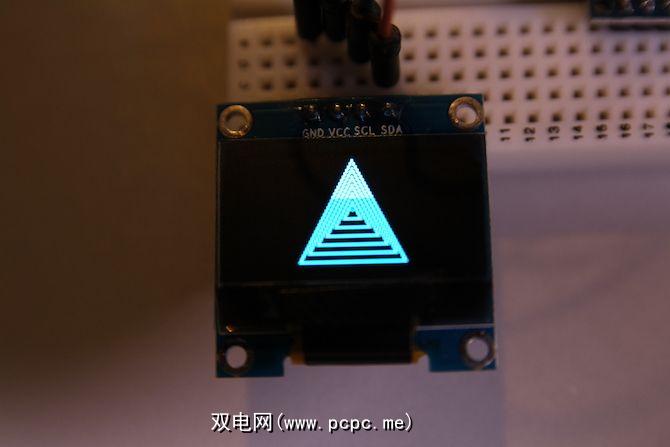
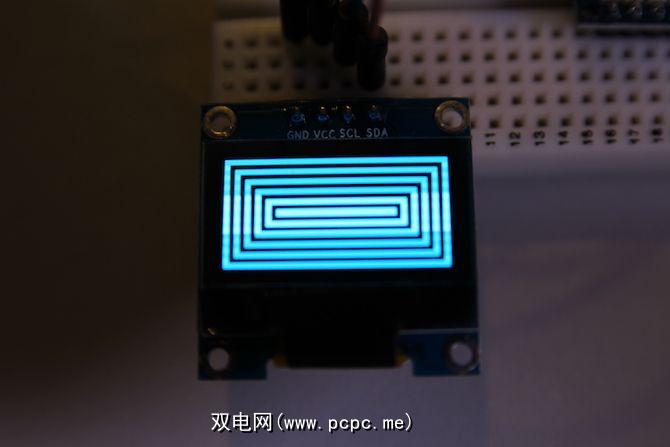
现在上传测试草图。转到文件>示例> Adafruit SSD1306 > ssd1306_128x64_i2c 。这应该为您提供一个包含大量图形的大草图:
如果上传后没有任何反应,请断开连接并再次检查您的连接。如果菜单中没有这些示例,则可能需要重新启动Arduino IDE。
代码
现在是时候编写代码了。我将解释每个步骤,所以如果您只想使其运行,请跳到最后。这是相当数量的代码,因此,如果您不确定,请查看以下10个免费资源以学习编码。
首先包括必要的库:
#include <SPI.h>#include <Wire.h>#include <Adafruit_GFX.h>#include <Adafruit_SSD1306.h>SPI 和 WIRE 是用于处理I2C通信的两个Arduino库。 Adafruit_GFX 和 Adafruit_SSD1306 是您先前安装的库。
Next, configure the display:
Adafruit_SSD1306 display(4);然后设置运行游戏所需的所有变量:
int resolution[2] = {128, 64}, ball[2] = {20, (resolution[1] / 2)};const int PIXEL_SIZE = 8, WALL_WIDTH = 4, PADDLE_WIDTH = 4, BALL_SIZE = 4, SPEED = 3;int playerScore = 0, aiScore = 0, playerPos = 0, aiPos = 0;char ballDirectionHori = 'R', ballDirectionVerti = 'S';boolean inProgress = true;这些存储了运行游戏所需的所有数据。其中一些存储球的位置,屏幕的大小,球员的位置等。请注意其中的一些是 const 的意思,它们是恒定的,并且永远不会改变。
屏幕分辨率和焊球位置存储在数组中。数组是相似事物的集合,对于球,存储坐标( X 和 Y )。访问数组中的元素很容易(不要在文件中包含此代码):
resolution[1];由于数组从零开始,这将返回分辨率数组中的第二个元素( 64 >)。更新元素甚至更加容易(再次,不包括此代码):
ball[1] = 15;Inside void setup(), configure the display:
void setup() { display.begin(SSD1306_SWITCHCAPVCC, 0x3C); display.display();}第一行告诉Adafruit库您的显示器正在使用什么尺寸和通讯协议(在这种情况下, 128 x 64 和 I2C )。第二行( display.display())告诉屏幕显示缓冲区中存储的内容(无内容)。
创建两个名为 drawBall 和 eraseBall :
void drawBall(int x, int y) { display.drawCircle(x, y, BALL_SIZE, WHITE);}void eraseBall(int x, int y) { display.drawCircle(x, y, BALL_SIZE, BLACK);}这些取球的 x 和 y 坐标并将其绘制在屏幕上使用显示库中的 drawCircle 方法。这使用了前面定义的常量 BALL_SIZE 。尝试更改此设置,看看会发生什么。此drawCircle方法接受像素颜色-黑色或白色。因为这是单色显示(一种颜色),所以白色表示像素处于打开状态,黑色表示像素处于关闭状态。
现在创建一种称为 moveAi 的方法:
void moveAi() { eraseAiPaddle(aiPos); if (ball[1] > aiPos) { ++aiPos; } else if (ball[1] < aiPos) { --aiPos; } drawAiPaddle(aiPos);}此方法处理移动人工智能或 AI 播放器。这是一个非常简单的计算机对手-如果球在桨上方,请向上移动。它在桨下面,向下移动。很简单,但是效果很好。增量和减量符号( ++ aiPos 和 –aiPos )用于从aiPosition中添加或减去一个。您可以添加或减去更大的数字以使AI更快地移动,因此更难以克服。以下是您的操作方法:
aiPos += 2;和
aiPos -= 2;加号和减号是加法的简写或从aiPos的当前值中减去两个。这是另一种实现方法:
aiPos = aiPos + 2;和
aiPos = aiPos - 1;请注意,此方法首先擦除划板,然后再次绘制。必须这样做。如果绘制了球拍的新位置,则屏幕上将有两个重叠的球拍。
drawNet 方法使用两个循环绘制球网:
void drawNet() { for (int i = 0; i < (resolution[1] / WALL_WIDTH); ++i) { drawPixel(((resolution[0] / 2) - 1), i * (WALL_WIDTH) + (WALL_WIDTH * i), WALL_WIDTH); }}这使用 WALL_WIDTH 变量来设置大小。
创建名为 drawPixels 和 erasePixels 的方法。就像球形方法一样,两者之间的唯一区别是像素的颜色:
void drawPixel(int posX, int posY, int dimensions) { for (int x = 0; x < dimensions; ++x) { for (int y = 0; y < dimensions; ++y) { display.drawPixel((posX + x), (posY + y), WHITE); } }}void erasePixel(int posX, int posY, int dimensions) { for (int x = 0; x < dimensions; ++x) { for (int y = 0; y < dimensions; ++y) { display.drawPixel((posX + x), (posY + y), BLACK); } }}再次,这两种方法都使用两个 for 循环绘制一组像素。循环不必使用库 drawPixel 方法绘制每个像素,而是根据给定的尺寸绘制一组像素。
drawScore 方法使用库的文本功能将播放器和AI得分写入屏幕。它们存储在 playerScore 和 aiScore 中:
void drawScore() { display.setTextSize(2); display.setTextColor(WHITE); display.setCursor(45, 0); display.println(playerScore); display.setCursor(75, 0); display.println(aiScore);}此方法还具有 eraseScore 对应项,可将像素设置为黑色或关闭。
最后四种方法非常相似。他们绘制并擦除了玩家和AI球拍:
void erasePlayerPaddle(int row) { erasePixel(0, row - (PADDLE_WIDTH * 2), PADDLE_WIDTH); erasePixel(0, row - PADDLE_WIDTH, PADDLE_WIDTH); erasePixel(0, row, PADDLE_WIDTH); erasePixel(0, row + PADDLE_WIDTH, PADDLE_WIDTH); erasePixel(0, row + (PADDLE_WIDTH + 2), PADDLE_WIDTH);}注意如何调用之前创建的 erasePixel 方法。这些方法会绘制并擦除适当的桨。
主循环中还有更多逻辑。这是整个代码:
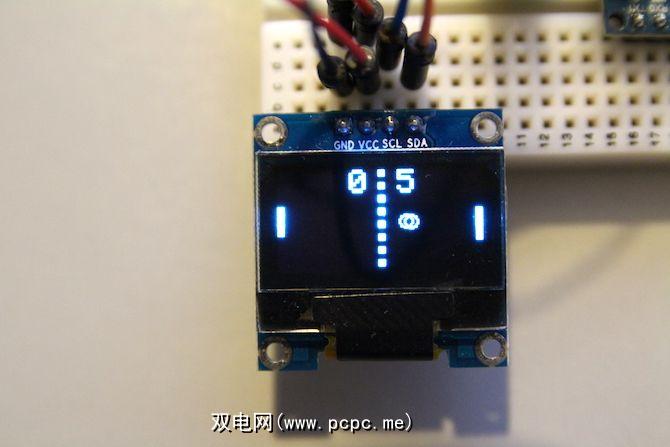
#include <SPI.h>#include <Wire.h>#include <Adafruit_GFX.h>#include <Adafruit_SSD1306.h>Adafruit_SSD1306 display(4);int resolution[2] = {128, 64}, ball[2] = {20, (resolution[1] / 2)};const int PIXEL_SIZE = 8, WALL_WIDTH = 4, PADDLE_WIDTH = 4, BALL_SIZE = 4, SPEED = 3;int playerScore = 0, aiScore = 0, playerPos = 0, aiPos = 0;char ballDirectionHori = 'R', ballDirectionVerti = 'S';boolean inProgress = true;void setup() { display.begin(SSD1306_SWITCHCAPVCC, 0x3C); display.display();}void loop() { if (aiScore > 9 || playerScore > 9) { // check game state inProgress = false; } if (inProgress) { eraseScore(); eraseBall(ball[0], ball[1]); if (ballDirectionVerti == 'U') { // move ball up diagonally ball[1] = ball[1] - SPEED; } if (ballDirectionVerti == 'D') { // move ball down diagonally ball[1] = ball[1] + SPEED; } if (ball[1] <= 0) { // bounce the ball off the top ballDirectionVerti = 'D'; } if (ball[1] >= resolution[1]) { // bounce the ball off the bottom ballDirectionVerti = 'U'; } if (ballDirectionHori == 'R') { ball[0] = ball[0] + SPEED; // move ball if (ball[0] >= (resolution[0] - 6)) { // ball is at the AI edge of the screen if ((aiPos + 12) >= ball[1] && (aiPos - 12) <= ball[1]) { // ball hits AI paddle if (ball[1] > (aiPos + 4)) { // deflect ball down ballDirectionVerti = 'D'; } else if (ball[1] < (aiPos - 4)) { // deflect ball up ballDirectionVerti = 'U'; } else { // deflect ball straight ballDirectionVerti = 'S'; } // change ball direction ballDirectionHori = 'L'; } else { // GOAL! ball[0] = 6; // move ball to other side of screen ballDirectionVerti = 'S'; // reset ball to straight travel ball[1] = resolution[1] / 2; // move ball to middle of screen ++playerScore; // increase player score } } } if (ballDirectionHori == 'L') { ball[0] = ball[0] - SPEED; // move ball if (ball[0] <= 6) { // ball is at the player edge of the screen if ((playerPos + 12) >= ball[1] && (playerPos - 12) <= ball[1]) { // ball hits player paddle if (ball[1] > (playerPos + 4)) { // deflect ball down ballDirectionVerti = 'D'; } else if (ball[1] < (playerPos - 4)) { // deflect ball up ballDirectionVerti = 'U'; } else { // deflect ball straight ballDirectionVerti = 'S'; } // change ball direction ballDirectionHori = 'R'; } else { ball[0] = resolution[0] - 6; // move ball to other side of screen ballDirectionVerti = 'S'; // reset ball to straight travel ball[1] = resolution[1] / 2; // move ball to middle of screen ++aiScore; // increase AI score } } } drawBall(ball[0], ball[1]); erasePlayerPaddle(playerPos); playerPos = analogRead(A2); // read player potentiometer playerPos = map(playerPos, 0, 1023, 8, 54); // convert value from 0 - 1023 to 8 - 54 drawPlayerPaddle(playerPos); moveAi(); drawNet(); drawScore(); } else { // somebody has won display.clearDisplay(); display.setTextSize(4); display.setTextColor(WHITE); display.setCursor(0, 0); // figure out who if (aiScore > playerScore) { display.println("YOU LOSE!"); } else if (playerScore > aiScore) { display.println("YOU WIN!"); } } display.display();}void moveAi() { // move the AI paddle eraseAiPaddle(aiPos); if (ball[1] > aiPos) { ++aiPos; } else if (ball[1] < aiPos) { --aiPos; } drawAiPaddle(aiPos);}void drawScore() { // draw AI and player scores display.setTextSize(2); display.setTextColor(WHITE); display.setCursor(45, 0); display.println(playerScore); display.setCursor(75, 0); display.println(aiScore);}void eraseScore() { // erase AI and player scores display.setTextSize(2); display.setTextColor(BLACK); display.setCursor(45, 0); display.println(playerScore); display.setCursor(75, 0); display.println(aiScore);}void drawNet() { for (int i = 0; i < (resolution[1] / WALL_WIDTH); ++i) { drawPixel(((resolution[0] / 2) - 1), i * (WALL_WIDTH) + (WALL_WIDTH * i), WALL_WIDTH); }}void drawPixel(int posX, int posY, int dimensions) { // draw group of pixels for (int x = 0; x < dimensions; ++x) { for (int y = 0; y < dimensions; ++y) { display.drawPixel((posX + x), (posY + y), WHITE); } }}void erasePixel(int posX, int posY, int dimensions) { // erase group of pixels for (int x = 0; x < dimensions; ++x) { for (int y = 0; y < dimensions; ++y) { display.drawPixel((posX + x), (posY + y), BLACK); } }}void erasePlayerPaddle(int row) { erasePixel(0, row - (PADDLE_WIDTH * 2), PADDLE_WIDTH); erasePixel(0, row - PADDLE_WIDTH, PADDLE_WIDTH); erasePixel(0, row, PADDLE_WIDTH); erasePixel(0, row + PADDLE_WIDTH, PADDLE_WIDTH); erasePixel(0, row + (PADDLE_WIDTH + 2), PADDLE_WIDTH);}void drawPlayerPaddle(int row) { drawPixel(0, row - (PADDLE_WIDTH * 2), PADDLE_WIDTH); drawPixel(0, row - PADDLE_WIDTH, PADDLE_WIDTH); drawPixel(0, row, PADDLE_WIDTH); drawPixel(0, row + PADDLE_WIDTH, PADDLE_WIDTH); drawPixel(0, row + (PADDLE_WIDTH + 2), PADDLE_WIDTH);}void drawAiPaddle(int row) { int column = resolution[0] - PADDLE_WIDTH; drawPixel(column, row - (PADDLE_WIDTH * 2), PADDLE_WIDTH); drawPixel(column, row - PADDLE_WIDTH, PADDLE_WIDTH); drawPixel(column, row, PADDLE_WIDTH); drawPixel(column, row + PADDLE_WIDTH, PADDLE_WIDTH); drawPixel(column, row + (PADDLE_WIDTH * 2), PADDLE_WIDTH);}void eraseAiPaddle(int row) { int column = resolution[0] - PADDLE_WIDTH; erasePixel(column, row - (PADDLE_WIDTH * 2), PADDLE_WIDTH); erasePixel(column, row - PADDLE_WIDTH, PADDLE_WIDTH); erasePixel(column, row, PADDLE_WIDTH); erasePixel(column, row + PADDLE_WIDTH, PADDLE_WIDTH); erasePixel(column, row + (PADDLE_WIDTH * 2), PADDLE_WIDTH);}void drawBall(int x, int y) { display.drawCircle(x, y, BALL_SIZE, WHITE);}void eraseBall(int x, int y) { display.drawCircle(x, y, BALL_SIZE, BLACK);}这是您最终得到的结果:
一旦您对代码充满信心,就可以进行许多修改:
现在看看这些复古游戏Pi Zero项目。
您是否使用此代码对Pong进行了编码?您做了哪些修改?在下面的评论中让我知道,我希望能看到一些图片!